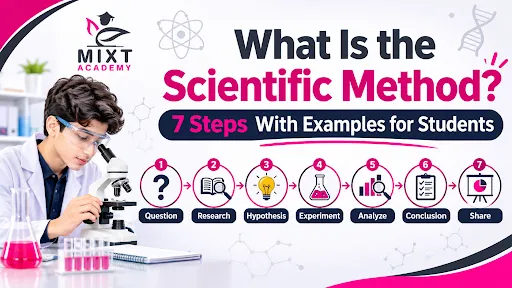
The scientific method is a step-by-step way scientists explore questions, test ideas, and draw conclusions based on evidence. It starts with observing something, then asking a question, forming a hypothesis, making a prediction, testing it, looking at the results, and deciding what they mean. Sharing what you find lets others check, question, and try the investigation themselves.
Whether students are learning biology, chemistry, or physics, the scientific method helps them see how scientific knowledge is built. Instead of memorising facts or guessing, students learn to ask questions, gather evidence, spot patterns, and explain what their results show.
For example, if a plant by a window grows taller than one in a darker spot, a student might wonder whether sunlight helps plants grow. The student can make a guess, set up a fair test, measure the plants over time, and compare what happens.
This way of thinking is helpful outside the science lab too. It helps people stay curious, think logically, solve problems, and make evidence-based decisions.
Why Is the Scientific Method Important?
The scientific method gives a clear way to explore questions. It helps students distinguish what they see from how they explain it, identify what evidence they need, and check whether their results match their initial ideas.
Its main benefits include:
- Better understanding: Students explore why scientific phenomena occur rather than simply memorising facts.
- Critical thinking: They learn to question their assumptions and consider other possible explanations.
- Accurate experimentation: They decide what to change and what to keep the same and set up tests that produce useful results.
- Data interpretation: They practise identifying patterns, comparing measurements and recognising limitations.
- Clear communication: They learn how to explain what they did and what they found so that others can understand and check their work.
- Improved practical skills: They get better at planning, doing, and reviewing experiments at school, which builds their confidence.
If you want to learn more about scientific ideas and how they matter in daily life, check out this guide on what science is and how scientific thinking works.
What Are the 7 Steps of the Scientific Method?
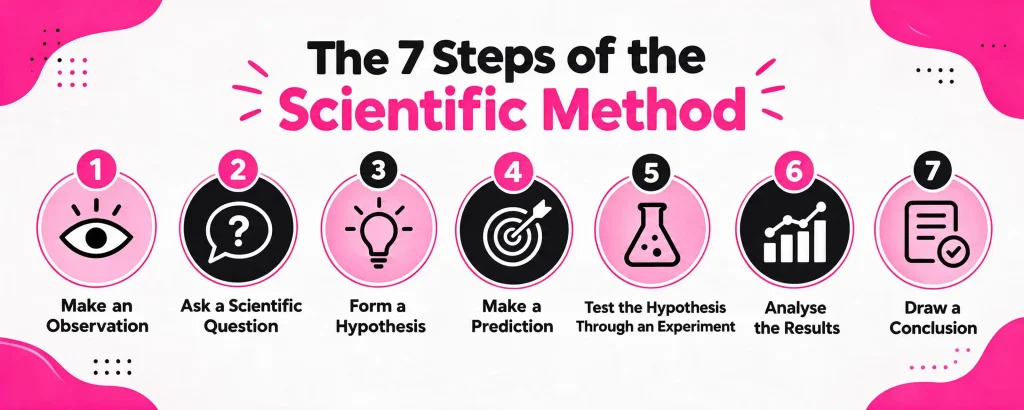
The seven steps of the scientific method help organise an investigation. Some textbooks or scientific groups group or name these steps differently, and real investigations do not always follow them in order. Researchers often return to earlier steps when new evidence raises more questions.
For school experiments, these seven steps give you a practical way to get started.
Step 1: Make an Observation
An observation is something you notice about the world by using your senses or scientific tools. Many investigations start when someone sees a pattern, spots a difference, or finds something that needs to be explained. Observations can be qualitative or quantitative.
- Qualitative observations describe qualities, such as colour, appearance, texture or whether bubbles form.
- Quantitative observations involve numerical measurements, such as temperature, mass, length, time or volume.
Example: A student notices that a plant placed near a sunny window appears taller than a similar plant kept in a darker location.
The observation shows a possible pattern, but it does not prove the cause. The plants might have different amounts of water, soil, age, or other differences.
Remember to write down what you really see before trying to explain why it happened. Do not treat guesses as facts.
Step 2: Ask a Scientific Question
After you make an observation, come up with a question that you can answer by collecting evidence.
A good scientific question is clear, focused, and can be tested. It should name the thing you are changing and, if possible, what you will measure.
For example:
- Vague question: Why do plants grow differently?
- More focused question: How does the amount of light a plant receives each day affect the growth of a particular plant species?
The second question is easier to test because it says what you can change and what you can measure.
How to create a good scientific question:
- Start with an observation.
- Identify a possible factor that might explain it.
- Decide what can be measured.
- Consider whether the investigation can be carried out fairly and safely.
- Write a question that can be answered using evidence.
Example: A student notices that sugar dissolves more quickly in hot tea than in iced tea. The student asks, “How does water temperature affect the time required for a fixed amount of sugar to dissolve?”
This question gives a clear path for the experiment.
Step 3: Form a Hypothesis
A hypothesis is a testable idea that explains an observation or answers a scientific question. It should be based on what you already know, have seen, or learned before, not just a random guess.
A strong hypothesis identifies a relationship that can be tested.
Example:
“If a plant receives more hours of suitable light each day, then it will grow taller over a fixed period, provided that other important growing conditions remain similar.”
This hypothesis suggests a relationship between light exposure and plant growth. You can test it by measuring plants grown under different light conditions.
A useful hypothesis often follows this structure:
If [independent variable changes], then [dependent variable is expected to change], because [scientific explanation].
For instance:
“If water temperature increases, then sugar will dissolve more quickly because particles in warmer water have greater average kinetic energy and move more rapidly.”
This explanation gives a scientific reason for the prediction.
What makes a hypothesis good?
- It addresses the investigation’s question.
- It can be tested through observations or measurements.
- It identifies an expected relationship between variables.
- It is consistent with relevant scientific knowledge.
- It can be evaluated using evidence.
A hypothesis does not have to be right to be helpful. If the evidence does not support it, you can rethink your explanation and try a new experiment.
Step 4: Make a Prediction
A prediction describes the result you expect if your hypothesis is correct. Although hypotheses and predictions are closely connected, they serve different purposes:
- Hypothesis: An explanation for why something might happen.
- Prediction: A statement describing what should happen under specified conditions if the explanation is supported.
Example:
- Hypothesis: Water temperature affects how quickly sugar dissolves.
- Prediction: If equal amounts of sugar are stirred into equal volumes of water at different temperatures, the sugar in the warmer water will dissolve in less time, assuming the other conditions remain the same.
A prediction should be clear so you can compare it with what really happens.
When it makes sense, you can include numbers in your prediction. For example, you might predict that sugar will dissolve faster in hotter water than in colder water. Do not make up exact numbers unless you have a good scientific reason.
Predictions matter because they help you decide what to measure and make it easier to judge how your experiment turned out.
Step 5: Test the Hypothesis Through an Experiment
In this step, you plan and investigate to collect evidence. Before starting, students should decide:
- Which variable will be changed.
- Which outcome will be measured.
- Which conditions must remain constant.
- What equipment and materials are required.
- How measurements will be recorded.
- How many repeats are appropriate.
- What safety precautions are necessary.
A good experiment changes one thing (the independent variable), measures another (the dependent variable), and keeps other important things the same as much as possible.
Example: Testing how water temperature affects sugar dissolving time
- Prepare equal volumes of water at several suitable temperatures.
- Measure the same mass of sugar for each trial.
- Add the sugar to the water and start the timer.
- Stir each sample using the same method and at the same rate.
- Record the time required for the sugar to dissolve.
- Repeat each temperature condition where practical.
- Look at your results and compare them.
To make a fair comparison, use the same kind of sugar, the same amount of water, the same stirring method, and keep other factors the same. Always follow your teacher’s instructions and lab safety rules during experiments.
Remember, one experiment might not give you enough evidence for a strong conclusion. Repeating the experiment helps you spot odd results and makes your findings more reliable.
Step 6: Analyse the Results
After you finish the experiment, organise your data and look at what it tells you. This might include:
- Calculating averages.
- Comparing measurements between test conditions.
- Identifying patterns or trends.
- Creating tables and graphs.
- Identifying unusual results.
- Considering measurement uncertainty and possible sources of error.
Example: A student records the time required for sugar to dissolve in water at three different temperatures.
| Water temperature | Trial 1 | Trial 2 | Trial 3 | Mean dissolving time |
|---|---|---|---|---|
| 20°C | 120 seconds | 115 seconds | 125 seconds | 120 seconds |
| 40°C | 75 seconds | 70 seconds | 80 seconds | 75 seconds |
| 60°C | 45 seconds | 50 seconds | 40 seconds | 45 seconds |
These numbers are just examples and not from a real experiment. They show that as water temperature increases, the average time for sugar to dissolve decreases. In this case, the pattern matches the idea that sugar dissolves faster in warmer water.
But students should also consider whether stirring, maintaining a steady temperature, timing, or other factors might have changed the results.
How to analyse scientific data effectively:
- Check that measurements have been recorded correctly.
- Include appropriate units.
- Calculate averages where relevant.
- Compare the results across the tested conditions.
- Identify the main pattern or relationship.
- Consider unusual results and possible explanations.
- Decide whether the evidence supports the prediction.
Do not leave out or change results just because they do not match what you expected. Scientific conclusions should be based on the evidence you found.
Step 7: Draw a Conclusion
A conclusion answers the original scientific question using the investigation’s results.
It should explain what the evidence shows, say if the findings support the hypothesis, and mention specific observations or measurements.
A good conclusion does more than just say, “My hypothesis was correct.” It explains how the results connect to the prediction and points out any important limits.
Example conclusion:
The results showed that as water temperature increased, the average time for sugar to dissolve decreased. For example, it took 120 seconds at 20°C and only 45 seconds at 60°C. This supports the idea that sugar dissolves faster in warmer water in this experiment. Still, more tests and careful control of temperature and stirring would make the results more reliable.
Notice that this conclusion:
- Answers the research question.
- Uses numerical evidence.
- Relates the results to the prediction.
- Avoids claiming more than the experiment establishes.
- Recognises the value of further investigation.
What if the results do not support the hypothesis?
That is a normal part of science. The results might mean the hypothesis needs to change, the first explanation was missing something, or the experiment had limits.
Students should report the findings honestly and consider what could be investigated next.
What Happens After the Seven Steps? Communicate the Findings
Communication is an essential follow-up to the scientific method. Scientists share their questions, methods, data, and conclusions in reports, presentations, scientific papers, and other ways. This lets others check the evidence, spot any weaknesses, repeat the experiment, and build on what was found.
For school experiments, you might write a lab report, make a graph, present your results to the class, or explain your conclusion to your teacher.
A scientific report commonly includes:
- Title: What the investigation is about.
- Aim: What the experiment is intended to investigate.
- Hypothesis or prediction: What is expected to happen.
- Variables: What will change, what will be measured and what will remain constant.
- Materials: The equipment and substances required.
- Method: The procedure followed.
- Results: The observations and measurements collected.
- Analysis: The patterns, calculations and relationships identified.
- Conclusion: What the results indicate.
- Evaluation: Limitations, possible errors and suggested improvements.
Sharing your findings can also lead to new questions. In this way, science is an ongoing process, not just a task with one final answer.
Independent, Dependent and Control Variables
Variables are factors that can change or take different values during an investigation. Understanding them is essential for planning a fair experiment and interpreting results correctly.
Students commonly encounter three main types of variables in school practicals.
1. Independent Variable
The independent variable is the factor the investigator deliberately changes to find out how it affects the outcome.
In the sugar-dissolving experiment, water temperature is the independent variable.
2. Dependent Variable
The dependent variable is the factor measured or observed to determine the effect of changing the independent variable.
In this experiment, the time it takes for the sugar to dissolve is the dependent variable.
3. Controlled Variables
Controlled variables are factors kept the same, as far as possible, so that the investigation provides a fair comparison.
In the sugar-dissolving experiment, these might include the mass of sugar, the volume of water, the type of sugar and the stirring method.
Variables Table: Sugar-Dissolving Experiment
| Variable type | Example | Why it matters |
|---|---|---|
| Independent variable | Water temperature | This is deliberately changed to investigate its effect. |
| Dependent variable | Time taken for the sugar to dissolve | This is measured to determine the outcome. |
| Controlled variable | Mass of sugar | Different amounts could take different times to dissolve. |
| Controlled variable | Volume of water | Changing the volume could affect the comparison. |
| Controlled variable | Type of sugar | Different substances or sugar forms may behave differently. |
| Controlled variable | Stirring method | Different stirring rates could affect the dissolving time. |
| Controlled variable | Measuring procedure | A consistent method improves comparability between trials. |
What Is a Fair Test?
A fair test is an experiment set up so you can see how changing one thing affects the outcome, without other factors getting in the way.
The goal isn’t just to change one thing. You need to change the factor you’re testing, measure the results in the same way each time, and keep other important variables as constant as possible.
For example, if a student puts one plant in sunlight and another in darkness, but also waters them differently, it’s hard to know what caused any difference. The change could be due to light, water, or both.
To improve the experiment, the student should use similar plants and keep watering, soil, and pot size the same for each one.
Some variables can’t be controlled completely, especially when working with living things or in nature. Students should point out these limits and explain how they could affect the results.
Why Are Repeated Trials Important?
Repeating an experiment helps students see if the results are reliable or if one odd measurement changed the outcome.
For example, if students only measure how long sugar takes to dissolve once at each temperature, a timing mistake could make the results less accurate. Doing several trials lets students find a tutor and see how much the results vary.
Repeating experiments doesn’t remove every possible error, but it can make you more confident in your results.
How the Scientific Method Helps With GCSE and IGCSE Practical Questions
When answering practical questions, students should pay close attention to what the question is asking them to do.
| If the question asks you to… | You should… |
|---|---|
| State a hypothesis | Provide a testable explanation or expected relationship. |
| Make a prediction | Describe the expected result under specified conditions. |
| Identify the independent variable | State the factor deliberately changed. |
| Identify the dependent variable | State the outcome measured or observed. |
| Describe a fair test | Explain what changes and what remains constant. |
| Plan an experiment | Include apparatus, variables, a clear method, measurements and appropriate safety precautions. |
| Present results | Use a suitable table or graph with clear headings, units and scales. |
| Analyse results | Identify patterns and support statements with data. |
| Draw a conclusion | Answer the question using the evidence collected. |
| Evaluate an investigation | Identify specific limitations and realistic improvements. |
How Students Can Improve Their Practical Science Answers
Students can improve their answers by following a few simple habits:
- Use accurate scientific words. Make sure you know the difference between a hypothesis, a prediction, an observation, and a conclusion.
- Identify the variables clearly. Say which factor you change, which result you measure, and which conditions you keep the same.
- Include what you will measure and how you will measure it.
- Always write down the correct units. Without units, measurements can be unclear or hard to understand.
- Support your conclusions with evidence. Mention specific numbers or patterns instead of making claims without proof.
- Explain how your suggested change would fix a problem or make the results more reliable.
- Try using these methods in new situations, not just ones you have seen before. This helps you understand better than just memorising examples.
If you need more help or practice, you might find it useful to look for GCSE online tutors or online tutors in UAE. We can help you work through practical questions, spot mistakes, and improve your science skills.
When choosing a tutor, check if they know your syllabus, explain practical methods clearly, and give you chances to practise questions on your own.
Families searching for private IGCSE tuition in UAE can compare tutors by subject, teaching style, schedule, and what the student needs most.
How to Write a Scientific Method for a School Experiment
Writing a scientific method means explaining how you will do an investigation so someone else can understand and repeat it if needed.
In school science, scientific method usually means the whole process of investigating. A written method is the step-by-step instructions for one experiment. A strong experiment write-up is clear, organised, measurable and sufficiently detailed.
Step 1: Write a Clear Title
The title should identify the main factor or relationship being investigated.
Example: The Effect of Water Temperature on the Time Taken for Sugar to Dissolve.
Don’t use titles that are too general, like “Sugar Experiment”.
Step 2: State the Aim
The aim explains what you want to find out in the investigation.
Example: To investigate how water temperature affects the time required for a fixed mass of sugar to dissolve in a fixed volume of water.
A good aim is clear, focused, and mentions the main variables.
Step 3: Write a Hypothesis and Prediction
The hypothesis gives a testable explanation or relationship. The prediction says what you expect will happen.
Hypothesis: Water temperature affects the rate at which sugar dissolves.
Prediction: Sugar will dissolve faster in warmer water than in cooler water under otherwise similar conditions.
If you can, explain your prediction using science you already know.
Step 4: Identify the Variables
List the independent, dependent, and controlled variables. For the sugar-dissolving experiment:
- Independent variable: Water temperature.
- Dependent variable: Time taken for the sugar to dissolve.
- Controlled variables: Mass and type of sugar, volume of water, stirring method and the procedure used to decide when the sugar has dissolved.
Naming the variables shows you have planned the investigation in an organised way.
Step 5: List the Materials
List all the equipment and materials you need for the experiment. For a simple sugar-dissolving experiment your teacher approves, you might need:
- Measuring cylinder.
- Suitable containers.
- Thermometer.
- Sugar.
- Water.
- Timer.
- Measuring balance, if needed.
- Stirring rod or another suitable stirring tool.
- Safety equipment specified by the teacher.
Only include equipment you will actually use in your experiment.
Step 6: Describe the Method in Numbered Steps
Write the method in a logical order. Make sure each step is clear so another student can follow it.
A good method specifies relevant quantities, how variables will be changed, what will be measured and how results will be recorded.
Don’t use unclear instructions like “add some sugar” or “use hot water”. Say the exact amounts and conditions once you have planned them.
Step 7: Prepare a Results Table
A results table needs clear headings and units. For example:
| Water temperature (°C) | Trial 1: time (s) | Trial 2: time (s) | Trial 3: time (s) | Mean time (s) |
|---|---|---|---|---|
| 20 | ||||
| 40 | ||||
| 60 |
Use the blank table to record your own observations. Enter your actual measurements instead of example numbers.
Step 8: Analyse the Results
After you finish the experiment, calculate the averages, compare the different conditions, and look for patterns.
Think about whether making a graph would help show the relationship between the independent and dependent variables.
In the example above, you could check if the average dissolving time gets shorter as the water temperature goes up.
Step 9: Write an Evidence-Based Conclusion
Answer the research question and use your measurements to support your answer.
Avoid statements such as “The experiment was successful” unless you explain what the evidence shows and how the aim was addressed.
Step 10: Evaluate the Experiment
Point out any limitations that might have affected your results, and suggest clear ways to improve the experiment.
For example, if the water temperature changes during a trial, you could improve the experiment by measuring it and keeping it steady with a better method.
If the timing procedure is subjective, define a clearer endpoint and apply it consistently.
Use the Scientific Method to Think Like a Scientist
The scientific method helps students investigate questions, test ideas, and draw conclusions based on evidence. When students learn the seven steps—observation, questioning, hypothesis, prediction, testing, analysis, and conclusion—they can approach science with more confidence and a better understanding of how investigations work.
The process works best when students understand variables, plan fair tests, record measurements carefully, repeat trials when needed, and explain their findings with evidence. It’s also important to see that unexpected results can be helpful and that a hypothesis may need to change when new evidence emerges.
Whether students are studying plant growth, chemical reactions, or physical relationships, the scientific method links what they learn in class to real experiments. Practicing these steps often can build stronger critical thinking, problem-solving, and science communication skills in biology, chemistry, and physics.
Most importantly, science is not only about finding the expected answer. It’s about asking good questions, testing ideas carefully, and being open to changing explanations when the evidence suggests something different.